Posted on

Guide to using Greaseweazle Floppy Disk Hardware Kit

This guide shows how to install Greaseweazle software with an easy to use graphic user interface on your windows PC, first download the main Greaseweazle Host Tools archive and the GUI Menu from the links below.

Main Greaseweazle Windows Software

https://github.com/keirf/greaseweazle/releases/download/v1.18/greaseweazle-1.18-win64.zip

Greaseweazle GUI Windows Graphic User Interface

https://desertsagesolutions.com/software/greaseweazle/windows/GreaseweazleGUI-v2.121.zip

Now unzip the main Greaseweazle folder to your Windows desktop from the first download link

Then unzip the  file “GreaseweazleGUI.exe” from the second download link and copy it into the folder you just extracted

**Note (this file needs to be inside the main Greaseweazle Folder to work)

Then run “GreaseweazleGUI.exe”, by double clicking and you will see the main menu screen below

If your Greaseweazle hardware is connected it will show as a device inside the USB Serial ports window, to ensure the hardware is working reliably you first need to check the  data speed, It’s recommended to only use a direct connection to your PC motherboard USB 2 or faster ports, front panel USB ports and hubs may slow down the connection and cause problems and errors.

Now to test the connection speed, select “Measure Bandwidth” from the middle row, then click the “Select” button

You will now see a command window and it will give a speed reading, the test will tell you if your connection is too slow to be reliable, run the test a few times to get a consistent reading, if your connection is too slow try a different USB port on your computer or use different or shorter usb cable.

Once the speed test has passed successfully you are then ready to read and write floppy disc images, if you get verify errors when trying to write a disk try a different disk, many Double Density disks will now be over 30 year old and may be contaminated with dirt or dust or have degraded magnetic coating this  can cause verify read and write errors, for older disks try using the “erase disk” function first before trying to write an image to disk.

Setting DiskDefs 

To use the latest Disk image Definition’s  supplied with the greasweazle gui download,  select “Globals” – then choose “Use DiskDefs File“, then select diskdefs.cfg  – now latest disk definitions  will then be available in the the “Format” drop down box when writing disk images

Mac and Linux Greaseweazle Host Tools Software Direct Download Link

https://github.com/keirf/greaseweazle/releases/download/v1.18/greaseweazle-1.18.zip

FloppyBridge Support – Use Real Disks with WinUAE & Amiberry Emulators

You can also use your Greaseweazle to read Amiga floppy disks directly into WinUae Emulator using the the floppybridge plugin, see guide linked below

https://trumouse.com/use-real-floppy-disks-on-winuae-amiga-emulator-with-floppybridge/

The main Greaseweazle Github Page is https://github.com/keirf/greaseweazle


Posted on

USE Real floppy disks in WinUAE with FloppyBridge or GreaseWeazle

Floppybridge is a plugin by Rob Smith that allows owners of a Drawbridge, Greaseweazle or Supercard Pro USB disk controller’s to use real amiga floppy disks on a PC

First download the floppybridge.zip – https://amiga.robsmithdev.co.uk/floppybridge1.4.zip

Then extract/unzip the contents into a new folder and name this folder “plugins”, then copy this folder into your WinUAE install folder, this location is usually “C:\Program Files\WinUAE\”

Now run WinUAE emulator


Connect your drive hardware and make sure its detected in windows either a Greaseweazle, Drawbridge or supercard

Select Floppy Drives under the Hardware section in the menu above, then for the first selected drive DF0, click option (3.5″ DD), this will open a drop down menu, now select the last option (Configure FloppyBridge)

You will now see the “Floppybridge profile manager” window, now click create

You can now create a disk for your specific hardware,  – as shown below

You can give the profile a name, then select the hardware with the Driver option, Drawbridge, Greaseweazle or SuperCard and the COM port of your specific hardware

Once you have set each option to match your hardware and preference, click ok – your profile will now appear in the floppy drive section as your chosen drive, you can now use real Amiga floppy disks directly with WinUAE amiga emulator

Posted on

Commodore Amiga 500 External Keyboard

The simple to install adapter is an easy solution for Amiga users who have installed there A500 or A500 Plus mainboard into a desktop or tower style case

The adapter is fully compatible with fits the popular Checkmate Amiga Case’s  https://checkmate1500plus.com/

Installation is easy, Just connect Pin1 on the PCB to Pin1 on the A500 keyboard pins with the included connecting cable

Compatible with the majority of PS/2 PC keyboards, no driver required just plug in and use, you can also still do a soft reset from keyboard with the key combination of

Left  Ctrl + Both Left & Right  Windows Keys (Recommended to get a keyboard with two windows keys)

For different region keyboards just change the keymap to match your keyboard layout in Workbench

Posted on Leave a comment

Retro 9 pin Joystick adapter to USB for A500 mini – C64 mini – PC

Gamers of the 80’s and 90’s used Joystick’s with a 9 pin D connector this was referred to as the Kempston or Atari interface standard the Sinclair Spectrum, Commodore 64, Atari 8 Bit home computers and the 16 bit Atari ST and Commodore Amiga also used this type of joystick

The Competition Pro and Zip Stick stand out as the better-quality options for these models were available with microswitches instead of the cheaper metal contact switches, although lower cost models from Quickshot, Cheetah, Sinclair, Commodore were very common in any gamer’s setup

For the true retro experience, you can now connect a vintage 9 pin joystick to your A500 mini, c64 mini or PC via the J2USB retro joystick adapter


Posted on Leave a comment

amiga joystick pinout

Amiga Joystick Pinout

Amiga 9 pin Male D Sub Mouse and Joystick Port pinout / Port 1 is shared with Mouse – Port 2 is Joystick Only

  • Pin 1  = Up (Also acts as mouse direction)
  • Pin 2 = Down (Also acts as mouse direction)
  • Pin 3 = Left (Also acts as mouse direction)
  • Pin 4 = Right (Also acts as mouse direction)
  • Pin 5  = Not Connected on Joysticks (Middle Mouse Button)
  • Pin 6 = Fire Button 1 (Acts as mouse button)
  • Pin 7 = 5 Volts DC- Power Supply from computer
  • Pin 8 = Ground
  • Pin 9 = Fire Button 2 (Acts as mouse button)

All Commodore Amiga computers have two 9 pin D-SUB type connectors with male pins, Port 1 is usually used for connecting a mice, but for two player gaming the mouse can be unplugged and two joysticks or other game controllers can be connected at the same time.

The controller needs to be compatible with the Atari standard such as Competition Pro, ZipStick, QuickShot, Atari, Cheetah etc are compatible

For two player games with two controllers you will have to unplug the mouse, unless you use a joystick switcher box like the once shown below

Amiga mouse adapters are now available than allow standard USB mice to be used with the amiga 9 pin mouse port, below if a mouse upgrade kit that includes a modern optical mouse and an adapter

Posted on Leave a comment

How to use the Logitech Unifying Receiver

The Logitech “Unifying” wireless USB receiver allows one receiver to work with multiple Logitech mice upto 6 devices can be added

First you need to download the unifying software from the link below

https://download01.logi.com/web/ftp/pub/techsupport/unifying/unifying252.exe

Install and run the unifying  software then follow the instructions to add your Logitech devices one at a time, once the software has been run and added the devices – you can now use all devices added with just one receiver

*Note devices used must be compatible with Unifying Receiver

Posted on Leave a comment

Amiga Scroll Wheel Mice

With a scroll wheel mouse interface and free software you can use a PS/2 compatible scroll wheel mouse on your Commodore Amiga Computer

ScrollWheel Drivers (2 options available – only install 1)
http://aminet.net/util/mouse/WheelBusMouse.lha

http://bax.comlab.uni-rostock.de/uploads/media/UWMouse_03.lha

FreeWheel is also required, it’s a utility to pass scroll wheel movement to applications or workbench 
http://aminet.net/util/mouse/FreeWheel.lha


Posted on Leave a comment

Amiga Drawbridge Guide how to Read and Write Floppy Disks

First connect the interface and power cable to your floppy disk drive make sure that the pins are lined up correctly, then you connect the usb cable to the side of the interface, dont use too mutch force as mini usb connectors are fragile.

Connect the usb cable to a USB 2 or USB 3 port on your PC or Laptop, it recommended to use a port on your motherboard, Note that front panel case USB ports and hubs can cause errors so it better to connect directly to the ports at the back of your PC.

Software Download

Download the software from this link – https://amiga.robsmithdev.co.uk/DrawBridge2.8.8.zip

The drawbridge software is open source and free to download from the developer’s website below

https://amiga.robsmithdev.co.uk/download

One downloaded, extract the .rar archive DrawBridge folder to your windows desktop

inside the Drawbridge folder, run the software “DrawBridgeWin.exe” – By Double Clicking

If the interface has been detected correctly the COM Port: window will show a com number – this shows the interface is plugged in and detected

***The disk interface is setup as a Drawbridge Plus, you can check this by using the Diagnostics test

If its not set, then you can tick the DrawBridge Config… button and tick the Drawbridge Plus Option 

Disk Errors or disk’s not working

Trial and error is sometimes required to get a successful disk written, the most common errors are caused by bad floppy drives, dirty drive heads or bad / perished floppy disk, remember that most disk are now around 30 years old and the magnetic disc inside may have deteriorated, if in doubt try a different disk or clean the drive heads, also using the “Perform several track erases before write” this can also help with some deteriorated disks.

Writing protected game disks required a drive with the correct rotation speed, clean heads and a reliable disk, if you have issues changing the drive used for a different brand or trying different floppy disks can solve many issues, fully formatting the disk before writing can also increase success.

Using High Density Disks 

The Amiga standard drives are designed for DD or Double Density floppy disks, as these disk were discontinued before the HD High Density PC floppy disks its sometimes easier to find high density floppies in good condition, some sellers still sell sealed old stock boxes of high density disks, they may not be as reliable long term as standard double density but they can be used with the Drawbridge Controller if modified, you will need to tape over the HD hole with tape or a sticky label for the disk to work with the drawbridge controller.

Convert a HD floppy disk to detect as a DD

How to Configure the FloppyBridge Plugin in WinUAE to use real floppy disks

Loading Amiga Floppy Disk’s directly into WinUAE Amiga Emulator 

To load disk’s directly into WinUAE, you need to download the Floppybridge plugins, then copy these inside a folder called “Plugins” in the WinUAE Directory

FloppyBridge Download link – https://amiga.robsmithdev.co.uk/floppybridge1.3.zip

You will need to make a new folder first called “Plugins” then copy the contents of the floppybridge zip inside the folder, this will enable the USB interface to load disk directly by selecting the “Floppy Drives”  under the hardware list on the left.  Then in the floppy disk window select the disk type for the drive you want eg DFO in the example below – by clicking the drop down menu showing the disk type the default will show “3.5 DD”, select this option

Click the window shown below, a drop down menu will now show option “Configure FloppyBridge” at the bottom of the list, this option allow setup of the interface as a disk drive for the emulator

WinUAE – The Windows Amiga Emulator can be downloaded fromhttps://www.winuae.net/download/


Posted on Leave a comment

Amiga 500 PC Keyboard Interface

The PS/2 Keyboard adapter, requires no soldering or software to work, it just pushes onto the keyboard connector pins of the A500 or A500 Plus and provides a standard PS/2 PC keyboard socket

Ideal if you need an external keyboard on your Commodore Amiga or if you have installed your Amiga motherboard into a desktop or tower style case

Its recommended to use a keyboard with TWO windows keys, this then allows the Amiga soft reset combination to be used by holding down CTRL + Left Windows + Right Windows

For Amiga users who want to install there mainboard into a desktop PC style case we now offer an internal PS/2 keyboard adapter

Fully compatible with the popular Checkmate cases like the 1500 https://checkmate1500plus.com

Posted on Leave a comment

AMX Mouse Adapter – Using Modern Mice on Vintage Computers

One of the first widespread computer mice aimed at the home computer market in the UK in 1985 was the AMX Mouse by Advanced Memory Systems

The mouse features 3 buttons and used mechanical rolling ball and optical sensors, available for Amstrad, Sinclair Spectrum and the Acorn BBC Micro these mice used an interface, the BBC Micro version used the 20 pin “user port” and also requires the AMX rom chip to be installed.

Posted on Leave a comment

Copy floppy disk from ANY computer with your PC (USB Flux Hardware)

USB flux hardware can allow any modern PC to read and write back ANY floppy disk drive regardless of protection or format, these devices can also be used to write back download disk images in a multitude of disk image formats such as adf. ipf, hfe  and scp

These devices ignore the disk formatting structure of the specific system eg Amiga or Atari ST and read the raw magnetic flux data from the disk

This means that all data is captured along with the protection See Image below it shows a representation of the flux data from an Amiga  game – captured from a 3.5″ Double Density Floppy Disk game


Posted on Leave a comment

Acorn Archimedes USB Mouse Adapter

Our compact Archimedes mouse adapter allows computers that use the Round 9 Pin Mini Din type socket either on the computer or keyboard to use the majority of wired  PC USB Mice and even some modern wireless models from Logitech & Philips

No Drivers or software required, just plug in you will get 3 button support the scroll wheel button acts as the middle mouse button.

Archimedes Wireless Mice

The Logitech M330, Philips M200 and all Logitech Mice that use or include the unifying USB receiver are compatible eg MX

Modern optical mouse connected to Archimedes keyboard


ArcMouse USB Mouse adapter from TruMouse connected to the A3000 Mouse Port
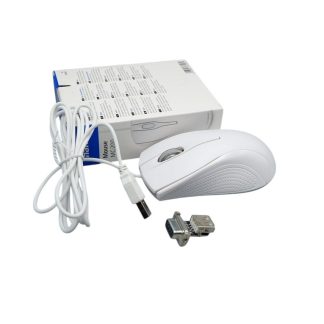
Logitech MX master connected to Acorn Archimedes A310 Keyboard
Posted on Leave a comment

Atari ST Mouse Adapter

The TruMOUSE ST is a small adapter that lets you use modern USB mice (including some wireless models) with your Atari ST

  • TruMOUSE is compatible with the vast majority of wired USB mice, it works with all models of Atari ST, STF, STFM, STE, TT, Mega and Falcon
  • Wireless Option – TruMOUSE ST is also compatible with Logitech and Philips Wireless Mice that use a USB Receiver
  • No Driver or Software is needed, just plug in and use
Posted on Leave a comment

Amiga Mouse Adapter


Mouse adapter’s for the commodore Amiga have been available for some time, the first adapters usually used a Microcontroller that did not contain a USB interface and relied on the mouse being PS/2 mode, many shapes and sizes of adapter were available some were very large and stuck out of the rear of the socket due to using through hole components requiring  a long circuit board.

The latest mouse adapters such as TruMouse were designed to be as small as possible and offer a high compatibility with most USB mice and even some wireless models from philips and Logitech

The TruMouse got its name as it’s a True USB adapter the dimension are just 30mm in Length and only 20mm Wide, its really tiny and fits ALL Amiga Models including the tightly spaced ports on the Amiga 600

              TruMouse Amiga USB Mouse Adapter


The TruMouse adapter is heat-shrinked to protect against static, various colour options are available, the image above shows the adapter with transparent shrink. The adapter is compatible with ALL Models of Commodore Amiga and the Amiga CD32 Console.

The TruMouse does not need any drivers or software and works when plugged in like any standard Amiga mouse, its supports 3 mouse button left click, right click and middle mouse button, this is the scroll wheel button on most PC mice

Wireless Mice on the Amiga ?

TruMouse supports most Logitech and the Philips M200 Series wireless usb mice from covering a range of budgets, starting at the Logitech M170 right up to the MX Master series

Checkout the Demonstration Video of the TruMouse Mouse Adapter from the Amiga Retro Cast on YouTube Channel

The TruMouse adapter is also available for ALL models of the Atari ST and Falcon 030