Modern Replacement Controllers for Philips CD-i Players – The Perfect Alternative to Rare Original CD-i Controllers
The Philips CD-i (Compact Disc Interactive) remains one of the most interesting and unusual pieces of 1990s gaming and multimedia history. Unlike traditional games consoles, the CD-i was designed as a complete interactive entertainment system, offering games, educational software, interactive encyclopaedias, music applications and video experiences.
Today, many Philips CD-i owners and collectors are looking to bring their systems back to life, but one problem often stands in the way – finding a working Philips CD-i controller.
Original CD-i controllers are now becoming increasingly rare. After more than 30 years, many have suffered from worn buttons, damaged cables, faulty switches or simply disappeared into collections. For anyone searching for a replacement CD-i mouse, trackball or gamepad, modern alternatives provide a reliable way to enjoy these classic machines again.
If you are searching for a replacement for the original Philips 22ER9011 mouse, 22ER9013 trackball controller or 22ER9021 gamepad, modern replacement controllers offer a practical solution without the difficulty and expense of tracking down vintage accessories.
Why Are Original Philips CD-i Controllers So Difficult to Find?
The Philips CD-i was different from most consoles because it supported several types of controllers depending on how the system was being used.
Philips produced a range of accessories, including:
- Philips 22ER9011 CD-i Mouse
- Philips 22ER9013 CD-i Trackball Controller
- Philips 22ER9021 CD-i Gamepad
The CD-i mouse was designed for accurate pointer control and was ideal for interactive applications, educational titles, adventure games and software that required selecting items on screen.
The trackball controller provided another unique way of navigating the CD-i interface, offering smooth cursor movement and a distinctive feel that became popular with collectors.
The gamepad was the preferred choice for many CD-i games, giving players a more familiar console-style controller layout.
Unfortunately, these original accessories are now considered collectible items, and finding one in good working condition can be challenging.
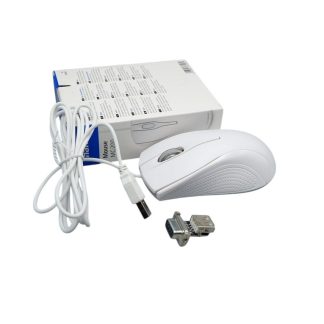
Philips CD-i Mouse Replacement – Alternative to the 22ER9011
The Philips CD-i Mouse 22ER9011 is one of the most recognisable CD-i accessories and remains highly sought after by collectors.
Originally supplied for precise navigation, the CD-i mouse was useful for:
- Interactive software
- Point-and-click games
- Educational applications
- Puzzle titles
- Menu navigation
Many CD-i owners searching online for terms such as “Philips CD-i mouse replacement”, “22ER9011 replacement” or “CD-i mouse controller” are discovering that original units are becoming harder to find and often command high prices.
A modern replacement CD-i controller provides a dependable alternative, allowing you to use your Philips CD-i player without relying on ageing vintage hardware.
Philips CD-i Trackball Replacement – Modern Alternative to the 22ER9013
The Philips 22ER9013 Trackball Controller was another unique accessory created for the CD-i platform.
Unlike a traditional mouse, the trackball offered a different style of control that suited the interactive nature of the CD-i system. Its unusual design has made it a favourite among collectors and retro enthusiasts.
Today, original CD-i trackball controllers are particularly difficult to source, especially complete working examples.
For anyone searching for:
- Philips CD-i trackball replacement
- 22ER9013 replacement controller
- CD-i trackerball alternative
a modern replacement offers an easier way to continue enjoying CD-i software without hunting for rare original accessories.
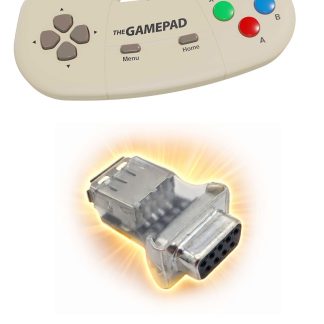
Philips CD-i Gamepad Replacement – Alternative to the 22ER9021
For gamers, the Philips 22ER9021 gamepad is one of the most familiar CD-i controllers.
Designed for playing CD-i games, the gamepad provided a more traditional gaming experience compared with the mouse and trackball options.
However, original 22ER9021 controllers are now increasingly difficult to find. Many surviving examples have seen years of use and may suffer from:
- Worn buttons
- Sticking controls
- Damaged cables
- General ageing
A modern replacement gamepad gives CD-i owners a reliable controller option for playing their favourite titles without the frustration of repairing or sourcing rare vintage hardware.
Why Choose a Modern Philips CD-i Controller Replacement?
Reliable Everyday Use
Vintage controllers can be over three decades old. Even controllers that have been carefully stored can develop problems over time.
A modern replacement controller allows you to spend more time enjoying your Philips CD-i and less time dealing with unreliable hardware.
Protect Your Original Accessories
Many collectors want to preserve genuine Philips CD-i accessories as part of their collection.
Using a modern replacement controller means your original 22ER9011 mouse, 22ER9013 trackball or 22ER9021 gamepad can be kept safely stored while you continue using your CD-i player regularly.
A Practical Alternative to Rare Originals
Searching auction sites and retro marketplaces for original CD-i controllers can often mean:
- High prices
- Incomplete accessories
- Controllers needing repair
- Long searches for suitable replacements
Modern CD-i controller replacements provide an affordable and practical option for collectors, gamers and enthusiasts.
Compatible With Philips CD-i Collectors and Retro Gaming Enthusiasts
Whether you own a Philips CD-i 210, CD-i 220, CD-i 450, CD-i 470 or another model from the CD-i family, having the correct controller is essential to getting the best experience from your system.
The CD-i was designed around multiple input methods, and the right controller allows you to enjoy the platform in the way it was intended.
From interactive adventures to classic CD-i games, a reliable controller is the key to making your system fully usable again.
Bring Your Philips CD-i Back to Life
The Philips CD-i is a fascinating piece of gaming and multimedia history, but enjoying one today can be difficult when original accessories are becoming increasingly rare.
Whether you need a replacement for the Philips 22ER9011 mouse, 22ER9013 trackball controller or 22ER9021 gamepad, modern replacement CD-i controllers provide a reliable way to restore your system and keep enjoying this unique platform.
If you are restoring a Philips CD-i player, adding to your retro collection or simply looking for a dependable controller replacement, explore our range of Philips CD-i replacement controllers and find the perfect accessory for your interactive player.


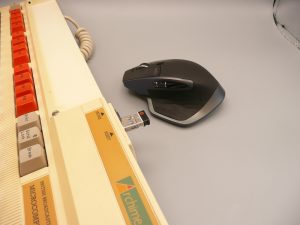 Logitech MX master connected to Acorn Archimedes A310 Keyboard