Posted on

Test and Use Your Retro Joysticks on Modern Devices

9-Pin Atari Joystick to USB Adapter: Test and Use Your Retro Joysticks on Modern Devices

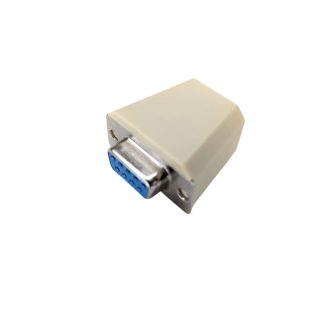
Have a collection of classic Atari-style 9-pin joysticks sitting in storage? Perhaps you’ve restored an old joystick and need an easy way to check whether it works, or you’d like to use your favourite retro joystick with a modern PC, Raspberry Pi or other USB-compatible device.

A 9-pin DE-9 joystick to USB adapter provides a simple solution.

Instead of buying a dedicated joystick tester that has only one purpose, a USB joystick adapter can do two jobs in one device:

  • Test your classic 9-pin joystick using a free PC joystick testing program
  • Convert the joystick into a standard USB game controller for use with modern devices
  • Check the joystick’s directional switches and fire button
  • Play PC games and retro-game emulators
  • Use compatible joysticks with Linux, Android TV boxes, NVIDIA Shield and Raspberry Pi systems

This makes a 9-pin joystick USB adapter particularly useful for retro gamers, collectors, repairers and anyone restoring classic Atari-style joysticks.

link


What Is a 9-Pin Joystick to USB Adapter?

Classic computers and consoles used a joystick connection that is very different from the USB connections found on modern computers.

Many Atari-style joysticks use a 9-pin DE-9 connector. These joysticks are simple, robust devices that use switches for directional movement and a fire button.

Modern PCs and other USB devices don’t normally have a suitable DE-9 joystick port.

A 9-pin to USB joystick adapter bridges the gap.

Connect your original 9-pin joystick to the adapter, then connect the adapter to a USB port. The joystick is presented to the modern device as a standard USB game controller.

This means you can use compatible vintage joysticks without modifying the original joystick or replacing its classic connector.


More Than Just a Joystick Tester

One of the biggest advantages of a USB joystick adapter is that it isn’t limited to testing.

There are dedicated LED joystick testers available that can show whether joystick switches are working. These can be useful when repairing or checking vintage controllers, but their primary purpose is testing.

A USB adapter offers another option.

With the right PC testing software, the same adapter can turn your computer into a convenient 9-pin joystick tester.

Once you’ve finished testing the joystick, you can continue using the adapter as a USB interface for gaming.

One adapter, two uses:

1. Test your joystick

Connect the vintage joystick and use free PC software to see the directional and fire-button inputs.

2. Use your joystick

Leave the adapter connected and use the classic joystick as a standard USB controller for compatible games and emulators.

This dual-purpose design can be particularly useful if you’re working with multiple vintage joysticks.


Free PC Joystick Tester

Test Your 9-Pin Joystick on a PC

If you’re restoring, buying or selling vintage joysticks, being able to quickly verify the controls is extremely useful.

A free joystick tester for PC can display the joystick’s inputs when connected through the USB adapter.

The tester shows the three joystick directions and the fire button inputs, allowing you to operate the joystick and immediately see whether the corresponding controls are being detected.

How to test a vintage joystick

Testing is straightforward:

  1. Connect the 9-pin joystick to the USB adapter.
  2. Connect the USB adapter to your Windows PC.
  3. Open the free joystick tester.
  4. Move the joystick in each direction.
  5. Press the fire button.
  6. Watch the tester display the corresponding inputs.

If an input does not register, the test can help identify that there may be an issue with the joystick, its switches or wiring.

Download the Free PC Joystick Tester

[INSERT FREE JOYSTICK TESTER DOWNLOAD LINK HERE]

The tester is useful for anyone restoring or maintaining classic joysticks and provides a quick way to confirm that the controls are being detected by the computer.


Why Use a USB Adapter Instead of a Dedicated LED Joystick Tester?

A dedicated hardware joystick tester can be convenient because it doesn’t require a computer. However, if you’re already using a PC for testing, a USB adapter can provide considerably more functionality.

A typical LED tester is designed primarily to answer one question:

Does the joystick switch work?

A USB adapter can answer that question through PC testing software while also allowing the joystick to be used as a USB controller.

That means the adapter can be useful for:

  • Testing vintage joysticks
  • Diagnosing joystick problems
  • Restoring retro controllers
  • Checking joysticks before selling them
  • Testing newly repaired joysticks
  • Playing retro games
  • Using vintage controllers with emulators
  • Connecting classic joysticks to modern USB devices

For someone who wants both a tester and a way to use their vintage joystick on modern hardware, this can make the adapter a practical alternative to purchasing separate equipment.


Use Your Classic Atari-Style Joystick on a Modern PC

The adapter isn’t just for repairs and testing.

Once connected, your vintage joystick can be recognised as a standard USB game controller.

This opens up the possibility of using an original-style 9-pin joystick with PC games and retro gaming software.

For retro gaming enthusiasts, this means you can combine the feel of a classic joystick with modern computer hardware.

Instead of using a modern USB controller that looks and feels completely different, you can connect a compatible vintage 9-pin joystick and keep the original controls in your hands.


Ideal for Retro Gaming and Emulation

Classic joysticks are particularly well suited to retro games.

Many older games were designed around simple digital joystick controls and a single fire button. Using the original style of joystick can therefore provide a more authentic experience when playing retro titles through emulation.

The USB adapter allows a compatible 9-pin joystick to be presented to the computer as a standard USB controller.

This can make it useful with suitable:

  • Retro gaming software
  • Game emulators
  • Classic game collections
  • PC games that support standard USB controllers

Your emulator or game software can then be configured to use the joystick’s USB inputs.


Compatible With More Than Just Windows PCs

Because the adapter operates as a standard USB game controller, it isn’t restricted to one specific type of computer.

Depending on the operating system and device, it can also be used with a range of USB-capable platforms.

Compatible applications can include:

Linux

Connect the adapter to a Linux computer and use your classic joystick as a USB controller with software that supports standard USB gamepads and joysticks.

Raspberry Pi

The adapter can be useful for Raspberry Pi retro-gaming projects, particularly where USB controllers are supported.

This makes it a handy addition to a DIY retro gaming setup.

Android TV Boxes

Compatible Android TV boxes can also recognise standard USB controllers, allowing a suitable vintage joystick to be used for retro gaming.

NVIDIA Shield

The adapter can also be useful with an NVIDIA Shield where standard USB game controllers are supported.

This provides another way to bring classic joystick controls into a modern living-room gaming setup.


Keep Your Original Joystick Unmodified

For collectors and retro enthusiasts, preserving original hardware is important.

A USB adapter provides a way to connect a compatible 9-pin joystick to modern equipment without permanently modifying the joystick itself.

Simply connect the joystick’s original DE-9 connector to the adapter and connect the adapter to USB.

This can be particularly useful when you want to:

  • Preserve an original joystick
  • Avoid rewiring vintage hardware
  • Test restored controllers
  • Use original joysticks with modern equipment
  • Switch between different vintage joysticks

If you have several compatible 9-pin joysticks, one adapter can also be used to test each controller in turn.


Useful for Vintage Joystick Restoration

Vintage joysticks can develop faults after decades of use.

The switches inside the joystick may become worn, dirty or damaged, while wiring and connectors can also require attention.

A PC-based joystick tester provides a convenient way to check the inputs after carrying out restoration or repairs.

For example, after cleaning or replacing a switch, you can connect the joystick to the adapter and check each control.

A simple restoration workflow

Step 1 – Inspect the joystick

Check the case, cable, connector and visible wiring.

Step 2 – Connect the joystick

Plug the 9-pin connector into the USB adapter.

Step 3 – Run the PC tester

Use the free joystick testing software to monitor the controls.

Step 4 – Test every direction

Move the joystick through each available direction and check that the corresponding input registers.

Step 5 – Test the fire button

Press the fire button and confirm that the input is detected.

Step 6 – Repair if necessary

If an input isn’t registering correctly, investigate the joystick’s switches, wiring or connections.

Step 7 – Test again

Posted on

Sega Mega Drive USB Adapter – Use Your Classic Controller on PC & More

Turn Your Classic Sega Mega Drive Controller Into a USB Gamepad

Still have an original Sega Mega Drive or Genesis controller sitting in a drawer? With the MegaGen USB Adapter, you can bring those classic 9-pin gamepads back into action and use them with modern USB devices.

Instead of replacing a perfectly good retro controller with a modern USB gamepad, the MegaGen USB Adapter lets you connect compatible 9-pin Sega Mega Drive and Genesis gamepads directly to USB devices.

It’s a simple, plug-and-play way to upgrade your old gamepad for modern gaming.

[Buy the MegaGen USB Adapter ]

Connect Your Original Sega Mega Drive Controller to USB

Classic Sega Mega Drive and Genesis controllers were designed long before USB became the standard for PC gaming. That doesn’t mean you have to leave them behind.

The MegaGen USB Adapter bridges the gap between your classic 9-pin controller and modern USB hardware.

Simply connect your compatible Mega Drive or Genesis gamepad to the adapter, plug the USB connector into your device, and you can start using your familiar controller for compatible games and emulators.

No complicated conversion process. No need to modify your original controller.

Just plug it in and play.

Why Use a MegaGen USB Adapter?

If you already own a favourite Sega controller, there are plenty of reasons to keep using it.

Keep Using Your Original Controller

Your old Mega Drive or Genesis controller has already earned its place in your collection. The MegaGen USB Adapter gives it a new lease of life with modern USB equipment.

Whether it’s the controller you used as a kid or a spare gamepad from your retro collection, you can connect it to a compatible USB device without replacing it.

Get That Classic Retro Feel

Modern controllers can be excellent, but they don’t always feel like the controllers you remember.

For retro gaming, having the original style of D-pad and buttons can make a big difference.

The MegaGen USB Adapter supports:

  • 4-direction D-pad
  • 4 fire buttons
  • Classic 9-pin Sega Mega Drive/Genesis gamepad connectivity
  • USB connectivity for modern devices
  • Plug-and-play operation

It’s an easy way to combine classic hardware with modern gaming systems.

Use Your Mega Drive Gamepad With PC, Mac, Linux and More

The MegaGen USB Adapter is designed for use with a wide range of USB-equipped devices.

Depending on your setup and the software you are using, you can use your converted controller with devices such as:

  • Windows PCs
  • Mac computers
  • Linux systems
  • Android devices
  • Android TV boxes
  • Raspberry Pi
  • Other compatible USB host devices

This makes the adapter particularly useful for retro gaming enthusiasts who run emulators on computers, Raspberry Pi systems and Android-based hardware.

Instead of buying a separate controller for every system, one classic gamepad can potentially be used across multiple USB setups.

Perfect for Retro Gaming and Emulation

The MegaGen USB Adapter is an excellent addition to a retro gaming setup.

If you’re running Mega Drive, Genesis or other compatible retro games through emulation, being able to use a familiar 9-pin controller gives your setup a more authentic feel.

It can also be useful for:

Retro gaming PCs – Connect a classic controller to a modern computer.

Raspberry Pi gaming projects – Add traditional console-style controls to your retro gaming build.

Android TV gaming – Use a compatible classic gamepad with an Android-based gaming setup.

Retro emulation – Enjoy your favourite classic games with a controller that feels at home in the era they came from.

A Simple Way to Upgrade Your Old Gamepad

One of the biggest advantages of the MegaGen USB Adapter is its simplicity.

You don’t need to replace the controller itself. You don’t need to permanently modify your vintage gamepad. And you don’t need to build your own USB conversion circuit.

The adapter provides a straightforward connection between the 9-pin Sega Mega Drive/Genesis controller interface and USB.

That makes it a practical option for retro gamers, collectors, hobbyists and anyone who wants to get more use out of their old controllers.

Don’t Throw Away Your Old Sega Controllers

Retro hardware is becoming increasingly valuable, but even if your old controller isn’t a collector’s item, there’s no reason for it to gather dust.

If the controller still works, the MegaGen USB Adapter can help you integrate it into a modern gaming setup.

It’s a small accessory that can make a big difference: take a classic controller and give it a modern USB connection.

MegaGen USB Adapter – Bring Your Classic Controller Back to Life

If you have a compatible 9-pin Sega Mega Drive or Genesis gamepad, the MegaGen USB Adapter is an easy way to upgrade it for use with USB devices.

You get the familiar 4-direction D-pad and four fire buttons, combined with the convenience of modern USB connectivity.

Whether you’re building a Raspberry Pi retro console, gaming on a PC, using an Android TV box or simply want to use your favourite original Sega controller again, the MegaGen USB Adapter is a simple solution.

Ready to upgrade your classic gamepad?

Get the MegaGen USB Adapter today and put your old Sega controller back into action.

Posted on

Retro Mouse & Joystick Adapters for Amiga, Atari ST, BBC, MSX & Mini Consoles

Upgrade your classic retro computer or mini console with high-quality modern mouse, keyboard and joystick adapters. Our range of precision-engineered adapters allows you to connect USB mice, modern keyboards and contemporary gamepads to legendary systems including the Commodore Amiga, Atari ST, Acorn BBC Micro, Archimedes, MSX and popular mini consoles.

Whether you are restoring original hardware or enhancing your gaming experience, our adapters provide reliable plug-and-play compatibility without modifying your machine.


Commodore Amiga Mouse & Joystick Adapters

Bring modern control to your Amiga setup with USB mouse adapters and joystick converters compatible with classic systems and mini recreations.

  • USB Mouse and Keyboard Adapters for A500, A500 Plus, A600, A1200, A1500, A2000, A3000, A4000 and CD32
  • Joystick & Gamepad Adapters
  • Joystick Adapters for The A500 Mini, The A1200, The C64 Mini and The Spectrum
  • Low latency performance for gaming

Atari ST USB Mouse & Controller Adapters

Replace ageing Atari ST mice with modern optical USB mice or upgrade your joystick setup with reliable controller adapters.

  • Atari ST USB Mouse Adapters
  • Precision optical mouse support
  • Joystick & Gamepad Converters
  • Simple plug and play installation

Acorn BBC Micro & Archimedes Adapters

Enhance your Acorn systems with modern peripherals while preserving original hardware integrity.

  • BBC Micro Mouse Adapters
  • Archimedes USB Mouse Support
  • Joystick Adapters for Retro Gaming
  • Reliable, stable and responsive performance

MSX Mouse & Joystick Adapters

Upgrade your MSX computer with modern control solutions designed for smooth operation and broad compatibility.

  • MSX USB Mouse Adapters
  • Modern Gamepad & Joystick Support
  • Designed for accuracy and low input lag

Mini Console & Modern System Compatibility

Our 9 pin joystick adapters are also compatible with popular mini retro systems, allowing you to improve control precision and comfort.

  • The A500 Mini
  • The C64 Mini
  • The C64 Maxi
  • The A1200
  • The Spectrum
  • Windows PC’s

Why Choose Our Retro Adapters?

  • Plug and play — no internal modification required
  • Designed for retro enthusiasts and collectors
  • Tested for compatibility and stability
  • Precision engineered for minimal latency
  • Ideal for gaming, development and restoration projects

Browse our full range of retro computer adapters and modernise your classic setup today.

Posted on

9-Pin Joystick to USB Adapter for PC – Retro Gaming Made Easy

Play Retro Games on Your PC with a 9-Pin (Atari Standard) Joystick to USB Adapter

If you’re a retro gaming enthusiast, nothing beats the nostalgia of using a classic joystick to play your favorite games. Now, with our 9-pin (Atari standard) joystick to USB adapter, you can connect vintage DE-9/DB9 joysticks to any Windows PC or laptop—bringing retro gaming into the modern era with ease.

What is a 9-Pin Joystick to USB Adapter?

The 9-pin joystick to USB adapter allows you to use 4-direction, 1-fire button joysticks, the classic standard for many vintage gaming consoles, on modern Windows computers. Perfect for emulators and retro gaming setups, it ensures that your favorite joysticks stay compatible and fully functional.

Features and Benefits

  • Plug-and-Play: No drivers required—simply plug in and start playing.
  • Wide Compatibility: Works with both vintage and modern 9-pin joysticks.
  • Perfect for Emulators: Supports all popular retro emulation software on Windows PCs and laptops.
  • Compact and Durable: Small, lightweight design built for long-lasting use.

Compatible Joystick Models

Our adapter supports most 9-pin joysticks, including these popular models + ALL Atari / Kempston compatible 9 pin Joysticks

Vintage Joysticks:

  • Atari CX Stick
  • Competition Pro
  • Zipstick
  • Quickshot Joysticks
  • Konix
  • Suncom Tac
  • Cheetah

Modern Joysticks:

  • ArcadeR Joystick
  • Monster Joystick

Other Compatible Models:

  • Suzo Happ Competition
  • Wico Command Control
  • TopTronics Joysticks

Whether you’re playing Pac-Man, Street Fighter, or Commodore 64 classics, this adapter delivers smooth and responsive controls.

Why You Need a 9-Pin to USB Adapter

Modern PCs no longer include DE-9 joystick ports, making retro hardware obsolete—unless you have this adapter. With it, you can:

  • Enjoy authentic gameplay with original joysticks.
  • Play classic games on modern PCs without lag.
  • Expand your retro gaming setup with minimal cost.


Ideal for Retro Gaming Enthusiasts

This adapter is perfect for retro gamers, collectors, and anyone who loves the authentic feel of vintage joysticks. It’s especially useful for:

  • Arcade cabinets with PC cores
  • Emulation setups on Windows PCs and laptops
  • Gamers who want a nostalgic feel with modern convenience

Final Thoughts

Don’t let outdated hardware stop your gaming fun. With the 9-pin joystick to USB adapter, you can revive your favorite joysticks—from Atari CX Stick to Monster Joystick—and enjoy a true retro gaming experience on modern PCs.

Posted on

clean 3.5 floppy drive head

clean 3.5 floppy drive head

PC head cleaning utilities, along with a cleaning disk are a simple way to clean contaminated magnetic read write heads without needing to disassemble the drive

During normal use and using old disks causes dust, dirt and contamination to build up on the drive heads, this can cause read and write errors

A cleaning disk can be used dry or wet by adding a few drops of isopropyl alcohol, the spinning cleaning media in the disk cleans the heads and removes contamination allowing the heads to function correctly

Links to Windows software to clean your disk drive with a TruMouse cleaning disk

There are two versions of the software available one is for older PC’s with floppy drives that are connected directly to the motherboard by ribbon cable and the second is for external USB floppy drives commonly used with more modern PC’s and laptops

USB Drive cleaner is compatible with Windows 7 onwards

Download Links

Posted on

Guide how clean floppy disk drive without disassembly

An easy way to clean the magnetic read / write heads on a 3.5″ floppy drive is to use a trumouse cleaning disk

The disk can be used dry or wet, to use wet just add a couple of drops of isopopyl alchohol to the white disk material before inserting into the drive

Below are download link for Amiga, Atari ST and PC DOS software that will work with the cleaning disk

Floppy Drive Head Cleaning Software Download 

Amiga Floppy Drive Head Cleaning Software

Atari ST Floppy Drive Head Cleaning Utility

DOS DISK DRIVE CLEANING UTILITIES

The DOS cleaning utilities are for vintage systems that run MS DOS, the .ZIP archive contains two drive cleaning tools Cleaner.exe and Floppy Disk Scrubber.com

typing Cleaner.exe into the DOS command line will start the drive cleaning program

To run floppy disk scrubber you need to type flopscrb.com followed by the disk drive letter A or B and then the amount of seconds you want to clean the disk, example commands below cleans drive A: for 25 seconds

“flopscrb.com a 25”

   Screenshot of Cleaner.exe – PC drive cleaning software

Posted on

3.5″ floppy disk cleaning kit

How to clean a floppy disk drive, the easy way

Floppy cleaning disks for any 3.5″ floppy drive are now available, our cleaning disks can be used wet (with isopropyl alcohol) or dry and can clean the read write heads, recommended if you are using old floppies that have deteriorated with age

The cleaning disks are supplied on there own, if you want to use them wet just use 2 drops of 100% isopropyl alcohol to the white inner disk material, this can be purchased online or from a chemists shop in the UK, it is flammable so please read the warning label and take care when using it.

FREE Floppy Disk Cleaning software for Amiga, Atari ST and PC

Not required but you can download these free disk cleaning utilities that move the heads over the cleaning disk to ensure a thorough clean of the magnetic read/write heads

Download link below contains floppy disk head cleaning software for the Commodore Amiga, you will need to extract the archive onto a disk and run the “HeadCleaner” executable in Workbench

Amiga Floppy Drive Head Cleaning Software

Atari ST Floppy Drive Head Cleaning Utility


Alternatively on an Amiga, ST or Archimedes just insert the disk and wait a few seconds, eject and then repeat the drive will try to read the cleaning disk and this will clean the heads.

Posted on

Create Amiga Disks with FluxEngine on Windows or Mac

With FluxEngine software  you can read, write and access files directly on Commodore Amiga floppy disks and is compatible with the Trumouse Greaseweazle drive kit

First download the latest version of FluxEngine from the website below, there are Windows and Apple Mac Versions

https://github.com/davidgiven/fluxengine/releases

When intstalled and run you will see the main Fluxengine menu screen shown above


Posted on

adb to usb adapter

ADB to USB Adapter

The TruMouse adb adapter allows you to connect an apple adb Mouse or apple adb keyboard to a a standard usb keyboard for PC, Notebook, Raspberry pi or mini pc etc

Adapter has a custom 3D printed case and has a standard USB connector and provides a 4 pin socket at the back to connect either a keyboard or mouse

Posted on

Gotek Rotary Encoder Install for FDD-UDD U144K / ELS34E

The U144k Gotek pcb does not havy any connections on a header like the standard board, but you can solder the correct connections directly onto the Microcontroller if you have a steady hand

The 3rd and 4th pin from the right are connected to the encoder as shown in the hi resolution photo below


Posted on

Retro Mouse Mat

We have a range of custom retro computing and retro-gaming themed mouse pads, ideal for use with you vintage home micro

A mouse mat, also known as a mouse pad, is a small pad that is placed on a desk or table to provide a smooth surface for a computer mouse to move on. The use of a mouse mat can provide a number of benefits for both the mouse and the user.

One of the main benefits of using a mouse mat is that it can improve the accuracy and precision of the mouse. A smooth surface allows the mouse to move more easily and accurately, which can be especially important for tasks such as gaming or graphic design. In addition, a mouse mat can also protect the surface of a desk or table from wear and tear caused by a mouse moving across it.

Another benefit of using a mouse mat is that it can help to reduce the amount of friction between the mouse and the surface it is moving on. This can help to make the mouse feel more responsive, and can also help to reduce the amount of wear and tear on the mouse itself.

In addition to these benefits, a mouse mat can also help to improve the overall comfort of using a computer mouse. Many mouse mats are designed with a soft, padded surface that can help to reduce the strain on the hand and wrist caused by prolonged use of a mouse. This can be especially helpful for people who spend a lot of time working on a computer.

Finally, a mouse mat can also be a stylish accessory for your work setup. Many mouse mats come in a variety of designs, colors and with different materials. Some mouse mats have designs that match with the gaming setup or office setup.

In conclusion, a mouse mat is a simple but effective accessory that can provide a number of benefits for both the mouse and the user. Whether you’re a gamer, graphic designer, or simply someone who spends a lot of time working on a computer, a mouse mat can help to improve the accuracy, precision, and comfort of using a mouse. It can also protect your desk or table from wear and tear and give a stylish look to your work setup. So, it is important to choose a suitable mouse mat to match your needs.

Posted on

History of 16 Bit Home Computers

The 16-bit computer era began in the early 1980s, with the introduction of several new personal computers that were more powerful and capable than their 8-bit predecessors. These computers were built with 16-bit microprocessors, which allowed them to process more data and perform more complex tasks than the 8-bit computers that came before them.

One of the most significant 16-bit computers of this era was the Commodore Amiga, which was first introduced in 1985. The Amiga was known for its advanced graphics and sound capabilities, and it was popular among gamers, graphic designers, and musicians. It featured a custom chipset that provided advanced features such as sprites, blitter and a custom audio processor, that allowed it to produce high-quality graphics and sound, that was not available on other computers at the time.

Another popular 16-bit computer of the era was the Atari ST, which was introduced in 1985. The Atari ST was a direct competitor to the Amiga and it also had advanced graphics and sound capabilities. The Atari ST was primarily marketed as a business computer, but it also found a following among musicians and gamers. It featured a Motorola 68000 CPU and a custom sound chip, that allowed for high-quality audio.

In the United Kingdom, the Acorn Archimedes was a 16-bit computer that was introduced in 1987. It was developed by Acorn Computers and it was primarily used in schools and universities. The Archimedes featured a 32-bit ARM CPU and its own custom OS (RISC OS), that made it a powerful machine, especially in math and scientific calculations.

These 16-bit computers brought significant advancements in technology and they were popular among a wide range of users. They allowed users to perform complex tasks, such as graphic design, music composition, and video editing, that were previously not possible on 8-bit computers. The Amiga, Atari ST, and Acorn Archimedes were all considered to be cutting-edge technology at the time of their release and they helped pave the way for the development of more powerful computers in the years to come.

Overall, the 16-bit era of personal computers was an important time in the development of technology and it marked a significant advancement in the capabilities of personal computers. The Amiga, Atari ST, and Acorn Archimedes were all significant players in this era, and they helped to shape the future of computing by introducing new features and capabilities that were not available on previous 8-bit computers.

Posted on

History of the computer Mouse

The computer mouse is a device that is used to point, click, and select items on a computer screen. It was first invented by Douglas Engelbart in the 1960s as a way to improve the way people interact with computers.

Before the invention of the mouse, the main way to interact with a computer was through the use of a keyboard. While this was effective for typing and entering commands, it was not very efficient for navigating and selecting items on the screen. Engelbart recognized this limitation and set out to create a more intuitive and efficient way to interact with computers.

In 1963, Engelbart began working on his invention at the Stanford Research Institute. He experimented with different shapes and designs, eventually settling on the classic “ball mouse” design that is still in use today. The ball mouse used a small ball inside the device that could be rolled in any direction, which would in turn move the cursor on the screen. This design allowed for much more precise movement and control than was possible with a keyboard.

In 1968, Engelbart and his team demonstrated the mouse for the first time at a computer conference. The demonstration was a huge success, and the mouse quickly became an essential tool for computer users everywhere. In the 1970s, the mouse began to be included with personal computers, and it has since become one of the most widely used input devices in the world.

In the 1980s, the mouse underwent several improvements, including the introduction of the optical mouse. This type of mouse used a small camera to track movement rather than a ball, which made it more precise and reliable. Today, most mice use this technology, and they have become even more advanced, with features such as added buttons, wireless connectivity, and gesture recognition.

Overall, the computer mouse has played a crucial role in the development of modern computing. It has greatly improved the way we interact with computers, making them much more accessible and user-friendly. The invention of the mouse has been a significant step in the evolution of human-computer interaction and it continues to be an essential tool for many people today.

Posted on

Amiga Keyboard USB Adapter

This adapter converts original Amiga keyboard’s to become a standard PC USB keyboard, this makes it easy to install into a case if building an emulated system based on Emulation such as WinUAE, Amibian or an A500 Mini, Raspberry Pi, Mister, Android Box or a PC

The A500 Keyboard plugs directly onto the adapter and you can connect the adapter with a standard Micro USB Cable

Conversion leads are available from us for existing Amiga 2000/3000 and 4000 external keyboards or you can install your A500 or A500 Plus keyboard into an external case like the Checkmate  1500

If instead  you want to use a USB keyboard on your Amiga then please see the AKey adapter below


Posted on

Guide to using Greaseweazle Floppy Disk Hardware Kit

This guide shows how to install Greaseweazle software (created by Keir Fraser) with an easy to use graphic user interface on a Windows PC

Main Greaseweazle Windows Software

https://github.com/keirf/greaseweazle/releases/download/v1.23/greaseweazle-1.23-win64.zip

Graphic User Interface for Greaseweazle from Desert Sage Solutions

https://desertsagesolutions.com/software/greaseweazle/windows/GreaseweazleGUI-v2.128.zip

Unzip the main Greaseweazle folder to your Windows desktop from the first download link

Unzip all the files  from the second download link and copy it into the first Greaseweazle folder you just extracted

**Note (ALL GUI file need to be inside the main Greaseweazle Folder to work correctly)

Now open GreaseweazleGUI.exe, by double clicking and you will see the  menu screen below

Greaseweazle GUI Settings

If your Greaseweazle hardware is connected it will show as a device inside the USB Serial ports window, to ensure the hardware is working reliably you first need to check the  data speed, It’s recommended to only use a direct connection to your PC motherboard USB 2 or faster ports, front panel USB ports and hubs may slow down the connection and cause problems and errors.

Now to test the connection speed, select “Measure Bandwidth” from the middle row, then click the “Select” button

You will now see a command window and it will give a speed reading, the test will tell you if your connection is too slow to be reliable, run the test a few times to get a consistent reading, if your connection is too slow try a different USB port on your computer or use different or shorter usb cable.

Once the speed test has passed successfully you are then ready to read and write floppy disc images, if you get verify errors when trying to write a disk try a different disk, many Double Density disks will now be over 30 year old and may be contaminated with dirt or dust or have degraded magnetic coating this  can cause verify read and write errors, for older disks try using the “erase disk” function first before trying to write an image to disk.

Setting DiskDefs 

To update  Disk image Definition’s  supplied with the greasweazle gui download,  select “Globals” – then choose “Use DiskDefs File“, then select diskdefs.cfg  – now latest disk definitions  will then be available in the the “Format” drop down box when writing disk images

Mac and Linux Greaseweazle Host Tools Software Direct Download Link

https://github.com/keirf/greaseweazle/releases/download/v1.23/greaseweazle-1.23.zip

FloppyBridge Support – Use Real Disks with WinUAE & Amiberry Emulators

You can also use your Greaseweazle to read Amiga floppy disks directly into WinUae Emulator using the the floppybridge plugin, see guide linked below

https://trumouse.com/use-real-floppy-disks-on-winuae-amiga-emulator-with-floppybridge/

Double Density Vs High Density Floppy Disks

**Note you will need to use the correct disk type for writing disk an example Amiga and Atari ST use Double Density disks, later IBM PC’s usehigh density disks, the floppy drive can tell if the wrong disk in inserted because they have write protect holes on different sides of the disk

Greaseweazle Github Page is https://github.com/keirf/greaseweazle


Posted on — Leave a comment

Retro 9 pin Joystick adapter to USB for A500 mini – C64 mini – PC

Gamers of the 80’s and 90’s used Joystick’s with a 9 pin D connector this was referred to as the Kempston or Atari interface standard the Sinclair Spectrum, Commodore 64, Atari 8 Bit home computers and the 16 bit Atari ST and Commodore Amiga also used this type of joystick

The Competition Pro and Zip Stick stand out as the better-quality options for these models were available with microswitches instead of the cheaper metal contact switches, although lower cost models from Quickshot, Cheetah, Sinclair, Commodore were very common in any gamer’s setup

For the true retro experience, you can now connect a vintage 9 pin joystick to your A500 mini, c64 mini or PC via the J2USB retro joystick adapter