9-Pin Atari Joystick to USB Adapter: Test and Use Your Retro Joysticks on Modern Devices
Have a collection of classic Atari-style 9-pin joysticks sitting in storage? Perhaps you’ve restored an old joystick and need an easy way to check whether it works, or you’d like to use your favourite retro joystick with a modern PC, Raspberry Pi or other USB-compatible device.
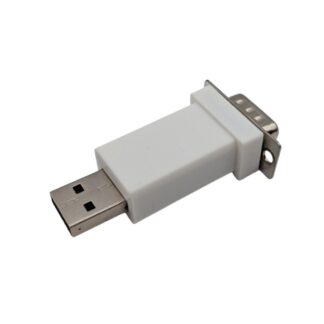
A 9-pin DE-9 joystick to USB adapter provides a simple solution.
Instead of buying a dedicated joystick tester that has only one purpose, a USB joystick adapter can do two jobs in one device:
- Test your classic 9-pin joystick using a free PC joystick testing program
- Convert the joystick into a standard USB game controller for use with modern devices
- Check the joystick’s directional switches and fire button
- Play PC games and retro-game emulators
- Use compatible joysticks with Linux, Android TV boxes, NVIDIA Shield and Raspberry Pi systems
This makes a 9-pin joystick USB adapter particularly useful for retro gamers, collectors, repairers and anyone restoring classic Atari-style joysticks.
link
What Is a 9-Pin Joystick to USB Adapter?
Classic computers and consoles used a joystick connection that is very different from the USB connections found on modern computers.
Many Atari-style joysticks use a 9-pin DE-9 connector. These joysticks are simple, robust devices that use switches for directional movement and a fire button.
Modern PCs and other USB devices don’t normally have a suitable DE-9 joystick port.
A 9-pin to USB joystick adapter bridges the gap.
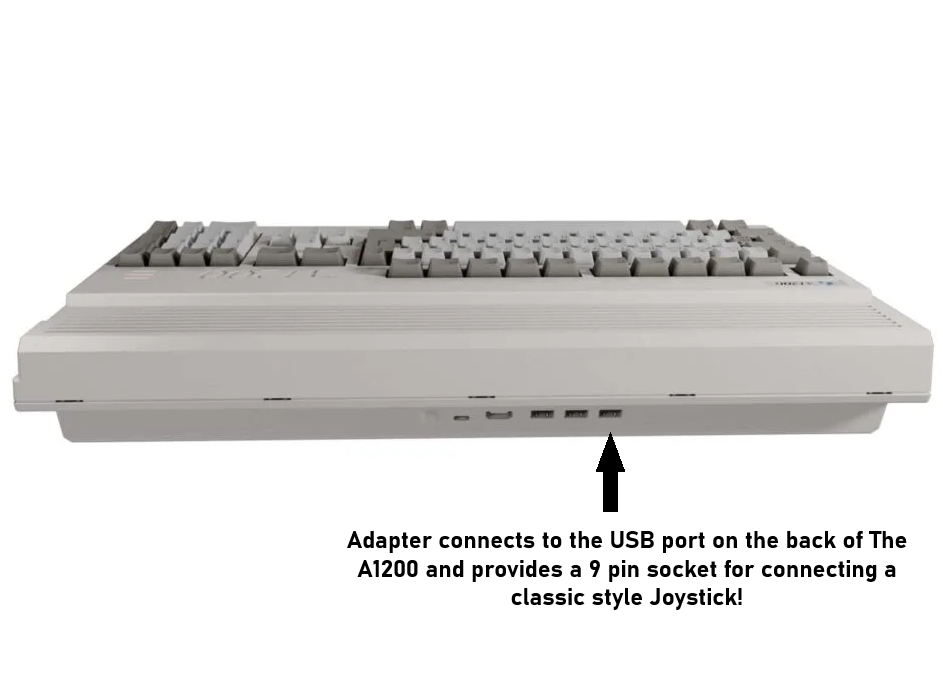
Connect your original 9-pin joystick to the adapter, then connect the adapter to a USB port. The joystick is presented to the modern device as a standard USB game controller.
This means you can use compatible vintage joysticks without modifying the original joystick or replacing its classic connector.
More Than Just a Joystick Tester
One of the biggest advantages of a USB joystick adapter is that it isn’t limited to testing.
There are dedicated LED joystick testers available that can show whether joystick switches are working. These can be useful when repairing or checking vintage controllers, but their primary purpose is testing.
A USB adapter offers another option.
With the right PC testing software, the same adapter can turn your computer into a convenient 9-pin joystick tester.
Once you’ve finished testing the joystick, you can continue using the adapter as a USB interface for gaming.
One adapter, two uses:
1. Test your joystick
Connect the vintage joystick and use free PC software to see the directional and fire-button inputs.
2. Use your joystick
Leave the adapter connected and use the classic joystick as a standard USB controller for compatible games and emulators.
This dual-purpose design can be particularly useful if you’re working with multiple vintage joysticks.
Free PC Joystick Tester
Test Your 9-Pin Joystick on a PC
If you’re restoring, buying or selling vintage joysticks, being able to quickly verify the controls is extremely useful.
A free joystick tester for PC can display the joystick’s inputs when connected through the USB adapter.
The tester shows the three joystick directions and the fire button inputs, allowing you to operate the joystick and immediately see whether the corresponding controls are being detected.
How to test a vintage joystick
Testing is straightforward:
- Connect the 9-pin joystick to the USB adapter.
- Connect the USB adapter to your Windows PC.
- Open the free joystick tester.
- Move the joystick in each direction.
- Press the fire button.
- Watch the tester display the corresponding inputs.
If an input does not register, the test can help identify that there may be an issue with the joystick, its switches or wiring.
Download the Free PC Joystick Tester
[INSERT FREE JOYSTICK TESTER DOWNLOAD LINK HERE]
The tester is useful for anyone restoring or maintaining classic joysticks and provides a quick way to confirm that the controls are being detected by the computer.
Why Use a USB Adapter Instead of a Dedicated LED Joystick Tester?
A dedicated hardware joystick tester can be convenient because it doesn’t require a computer. However, if you’re already using a PC for testing, a USB adapter can provide considerably more functionality.
A typical LED tester is designed primarily to answer one question:
Does the joystick switch work?
A USB adapter can answer that question through PC testing software while also allowing the joystick to be used as a USB controller.
That means the adapter can be useful for:
- Testing vintage joysticks
- Diagnosing joystick problems
- Restoring retro controllers
- Checking joysticks before selling them
- Testing newly repaired joysticks
- Playing retro games
- Using vintage controllers with emulators
- Connecting classic joysticks to modern USB devices
For someone who wants both a tester and a way to use their vintage joystick on modern hardware, this can make the adapter a practical alternative to purchasing separate equipment.
Use Your Classic Atari-Style Joystick on a Modern PC
The adapter isn’t just for repairs and testing.
Once connected, your vintage joystick can be recognised as a standard USB game controller.
This opens up the possibility of using an original-style 9-pin joystick with PC games and retro gaming software.
For retro gaming enthusiasts, this means you can combine the feel of a classic joystick with modern computer hardware.
Instead of using a modern USB controller that looks and feels completely different, you can connect a compatible vintage 9-pin joystick and keep the original controls in your hands.
Ideal for Retro Gaming and Emulation
Classic joysticks are particularly well suited to retro games.
Many older games were designed around simple digital joystick controls and a single fire button. Using the original style of joystick can therefore provide a more authentic experience when playing retro titles through emulation.
The USB adapter allows a compatible 9-pin joystick to be presented to the computer as a standard USB controller.
This can make it useful with suitable:
- Retro gaming software
- Game emulators
- Classic game collections
- PC games that support standard USB controllers
Your emulator or game software can then be configured to use the joystick’s USB inputs.
Compatible With More Than Just Windows PCs
Because the adapter operates as a standard USB game controller, it isn’t restricted to one specific type of computer.
Depending on the operating system and device, it can also be used with a range of USB-capable platforms.
Compatible applications can include:
Linux
Connect the adapter to a Linux computer and use your classic joystick as a USB controller with software that supports standard USB gamepads and joysticks.
Raspberry Pi
The adapter can be useful for Raspberry Pi retro-gaming projects, particularly where USB controllers are supported.
This makes it a handy addition to a DIY retro gaming setup.
Android TV Boxes
Compatible Android TV boxes can also recognise standard USB controllers, allowing a suitable vintage joystick to be used for retro gaming.
NVIDIA Shield
The adapter can also be useful with an NVIDIA Shield where standard USB game controllers are supported.
This provides another way to bring classic joystick controls into a modern living-room gaming setup.
Keep Your Original Joystick Unmodified
For collectors and retro enthusiasts, preserving original hardware is important.
A USB adapter provides a way to connect a compatible 9-pin joystick to modern equipment without permanently modifying the joystick itself.
Simply connect the joystick’s original DE-9 connector to the adapter and connect the adapter to USB.
This can be particularly useful when you want to:
- Preserve an original joystick
- Avoid rewiring vintage hardware
- Test restored controllers
- Use original joysticks with modern equipment
- Switch between different vintage joysticks
If you have several compatible 9-pin joysticks, one adapter can also be used to test each controller in turn.
Useful for Vintage Joystick Restoration
Vintage joysticks can develop faults after decades of use.
The switches inside the joystick may become worn, dirty or damaged, while wiring and connectors can also require attention.
A PC-based joystick tester provides a convenient way to check the inputs after carrying out restoration or repairs.
For example, after cleaning or replacing a switch, you can connect the joystick to the adapter and check each control.
A simple restoration workflow
Step 1 – Inspect the joystick
Check the case, cable, connector and visible wiring.
Step 2 – Connect the joystick
Plug the 9-pin connector into the USB adapter.
Step 3 – Run the PC tester
Use the free joystick testing software to monitor the controls.
Step 4 – Test every direction
Move the joystick through each available direction and check that the corresponding input registers.
Step 5 – Test the fire button
Press the fire button and confirm that the input is detected.
Step 6 – Repair if necessary
If an input isn’t registering correctly, investigate the joystick’s switches, wiring or connections.
Step 7 – Test again